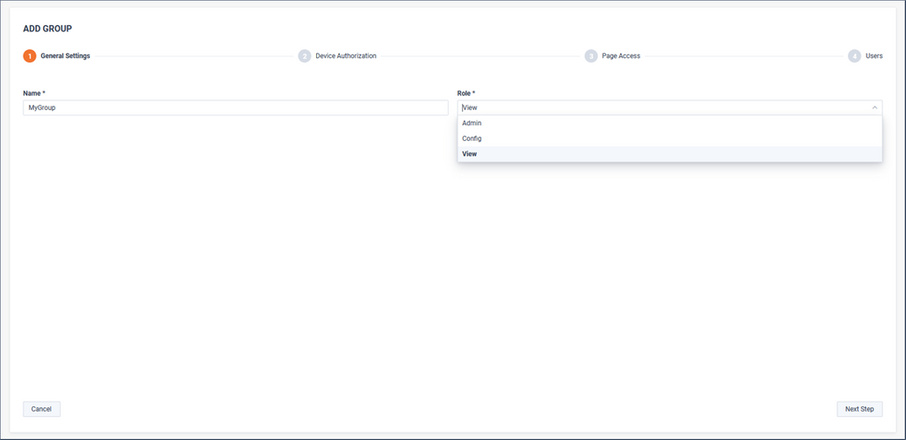
Adding a New Group
1. To begin Group management, click .

2. Provide a Name and Role.
3. Assign device authorization.
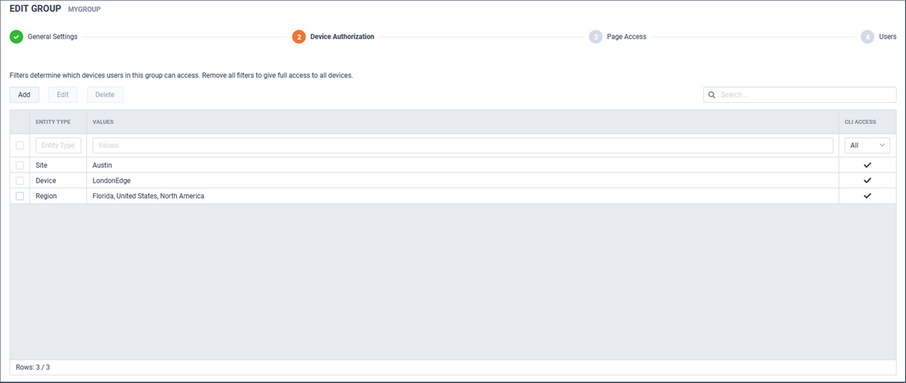
Device Authorization defines which device’s SNMP and NetFlow metrics are visible by group members. By default, all devices are available for all roles. Restricting visibility to selected devices can be accomplished by filtering devices, sites, or regions.
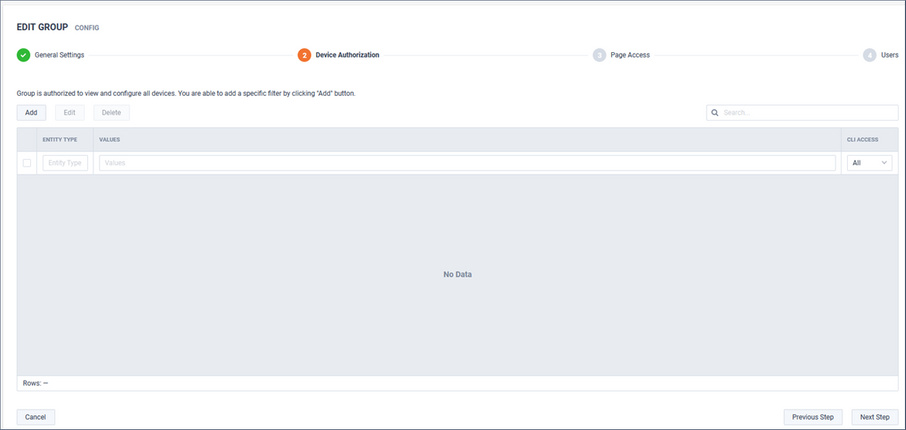
To restrict authorization to a specific device(s), click .
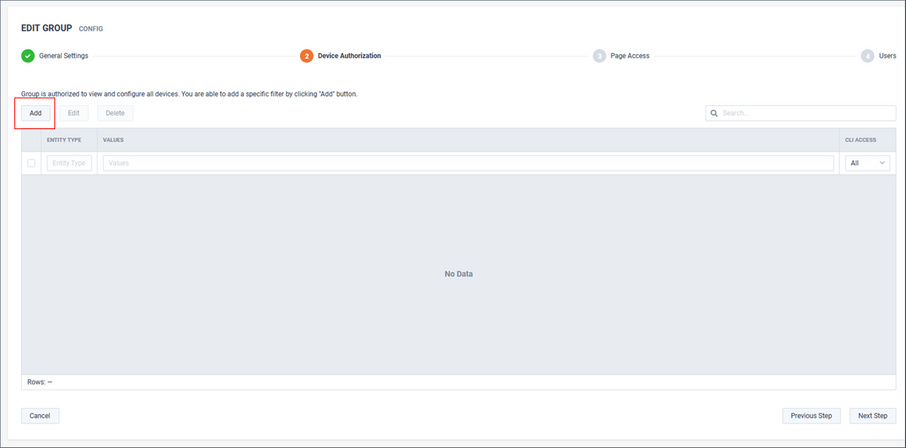
Filters can be applied by Device, Site, or Region.

Config roles can optionally have CLI access for managing QOS, IPSLA, etc. in the EngJneering Console.
In the following example, the devices matching the filters would be authorized for monitoring by this Group:
• Site=Austin
• Device=LondonEdge
• Region=Florida
4. Assign Operations Dashboard (WebUI) page access.
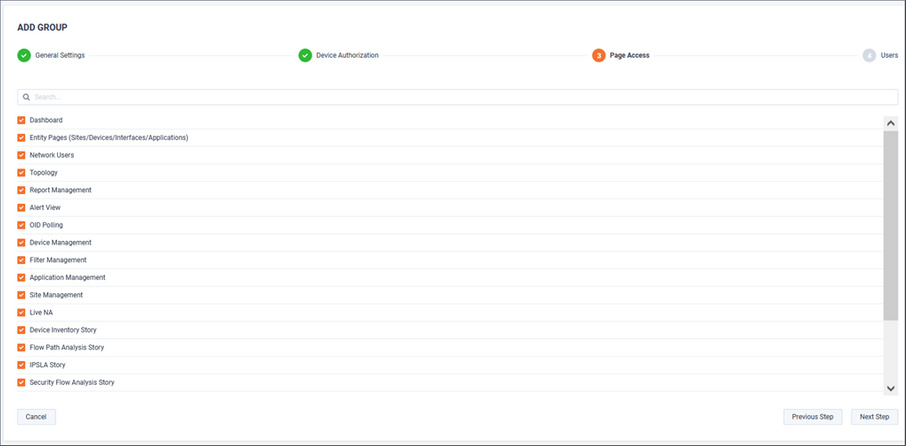
Operations Dashboard (WebUI) page access can be limited per role:
• Most pages are accessible by all Roles.
• Some pages are accessible to only Admins.
• Some pages are accessible to Admins and Config.
Below is a table showing the pages only available to Admin and Config Roles:
Section | Page | Required Page Access | Required Role |
|---|---|---|---|
Configure | Alert Management | – | admin |
Configure | Application Management | Application Management | config/admin |
Configure | OID Polling | OID Polling | config/admin |
Configure | Device Management | Device Management | config/admin |
Configure | Filter Management | Filter Management | config/admin |
Configure | Site Management | Site Management | config/admin |
Gear Icon | Settings | – | admin |
Gear Icon | User Management | – | admin |
Gear Icon | LiveNX Server | – | admin |
In this example, only Dashboards and Entity Pages (Sites/Devices/Interfaces/WAN Applications) will be available on the Navbar for this Group:
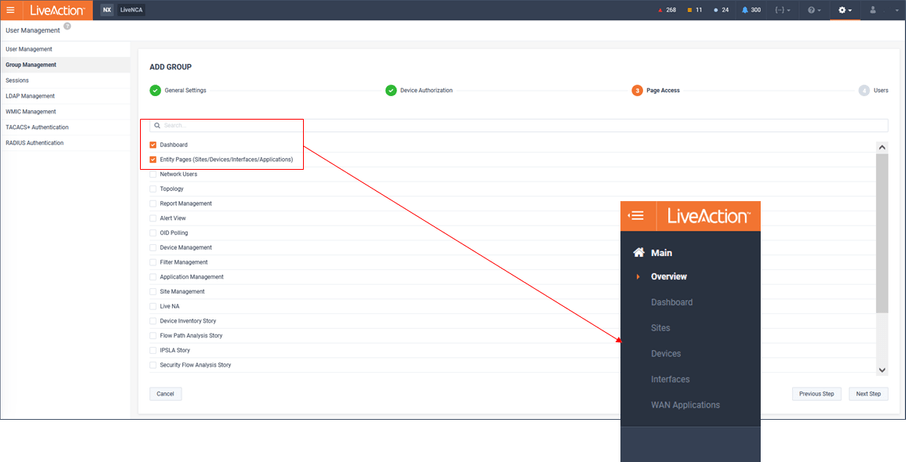
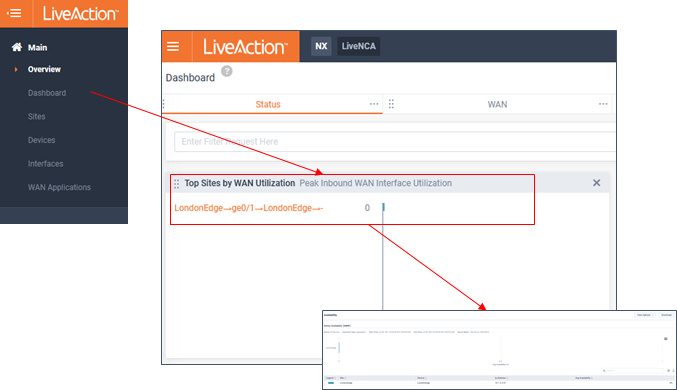
Do note that even though the Navbar may be restricted, some drill-down workflows will still allow limited functionality to pages not directly available from the Navbar. Using the previous example, where Dashboards were one of the limited options made available, these pages allow drill-down to reports, but the reports are limited to just the results.
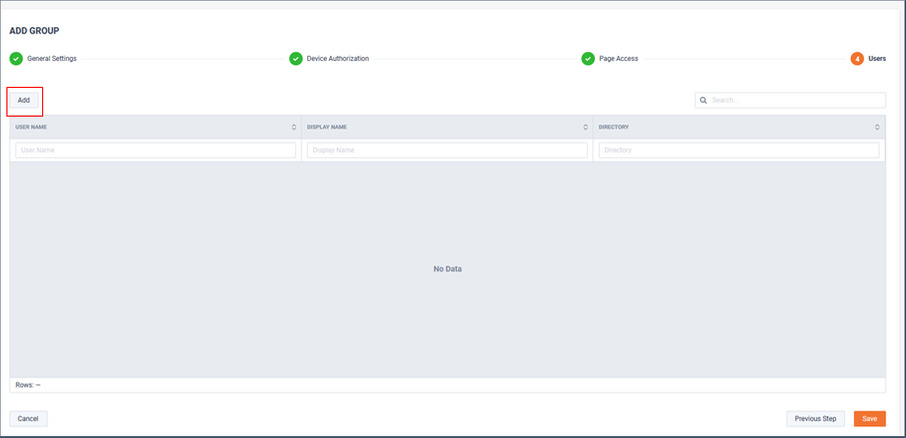
5. Add a user(s) to group by clicking .
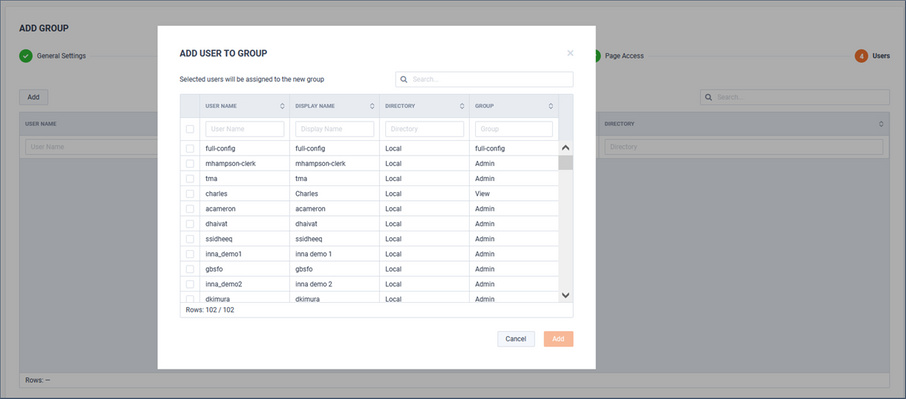
Select the users of interest and click .
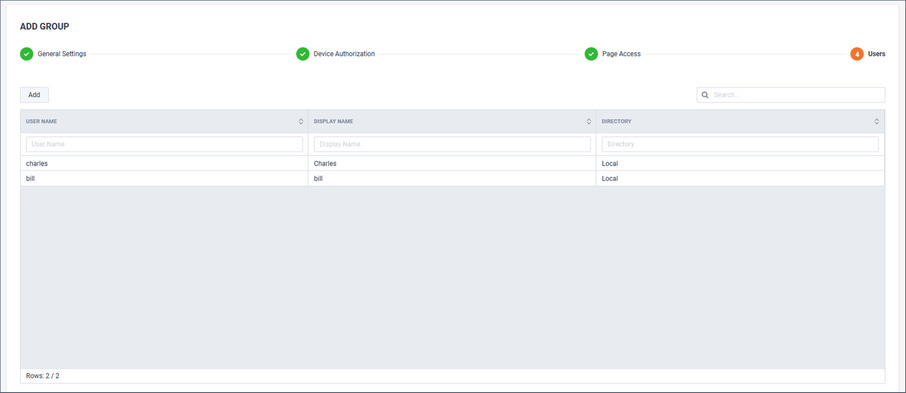
In this example, users Charles and Bill will be a member of this group.
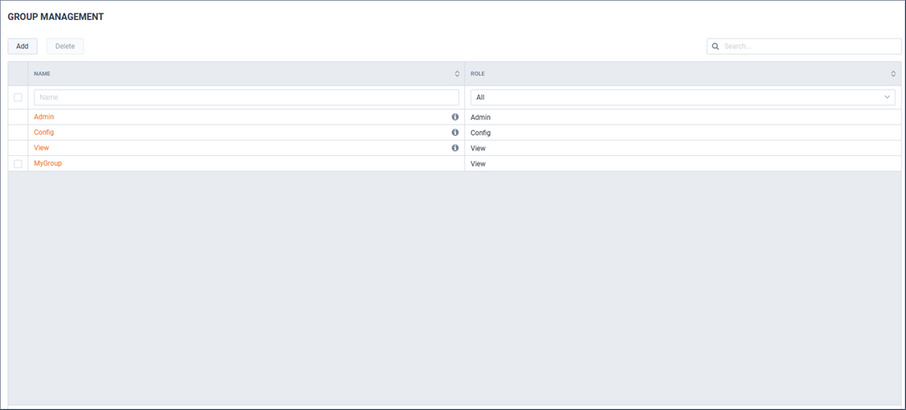
The new Group will now be listed on the Group Management page.